WooCommerce
This detailed example will show you how to actually build a working Flood Element script that uses a variety of different classes to identify objects you would like to interact with in order to successfully simulate a typical business process.
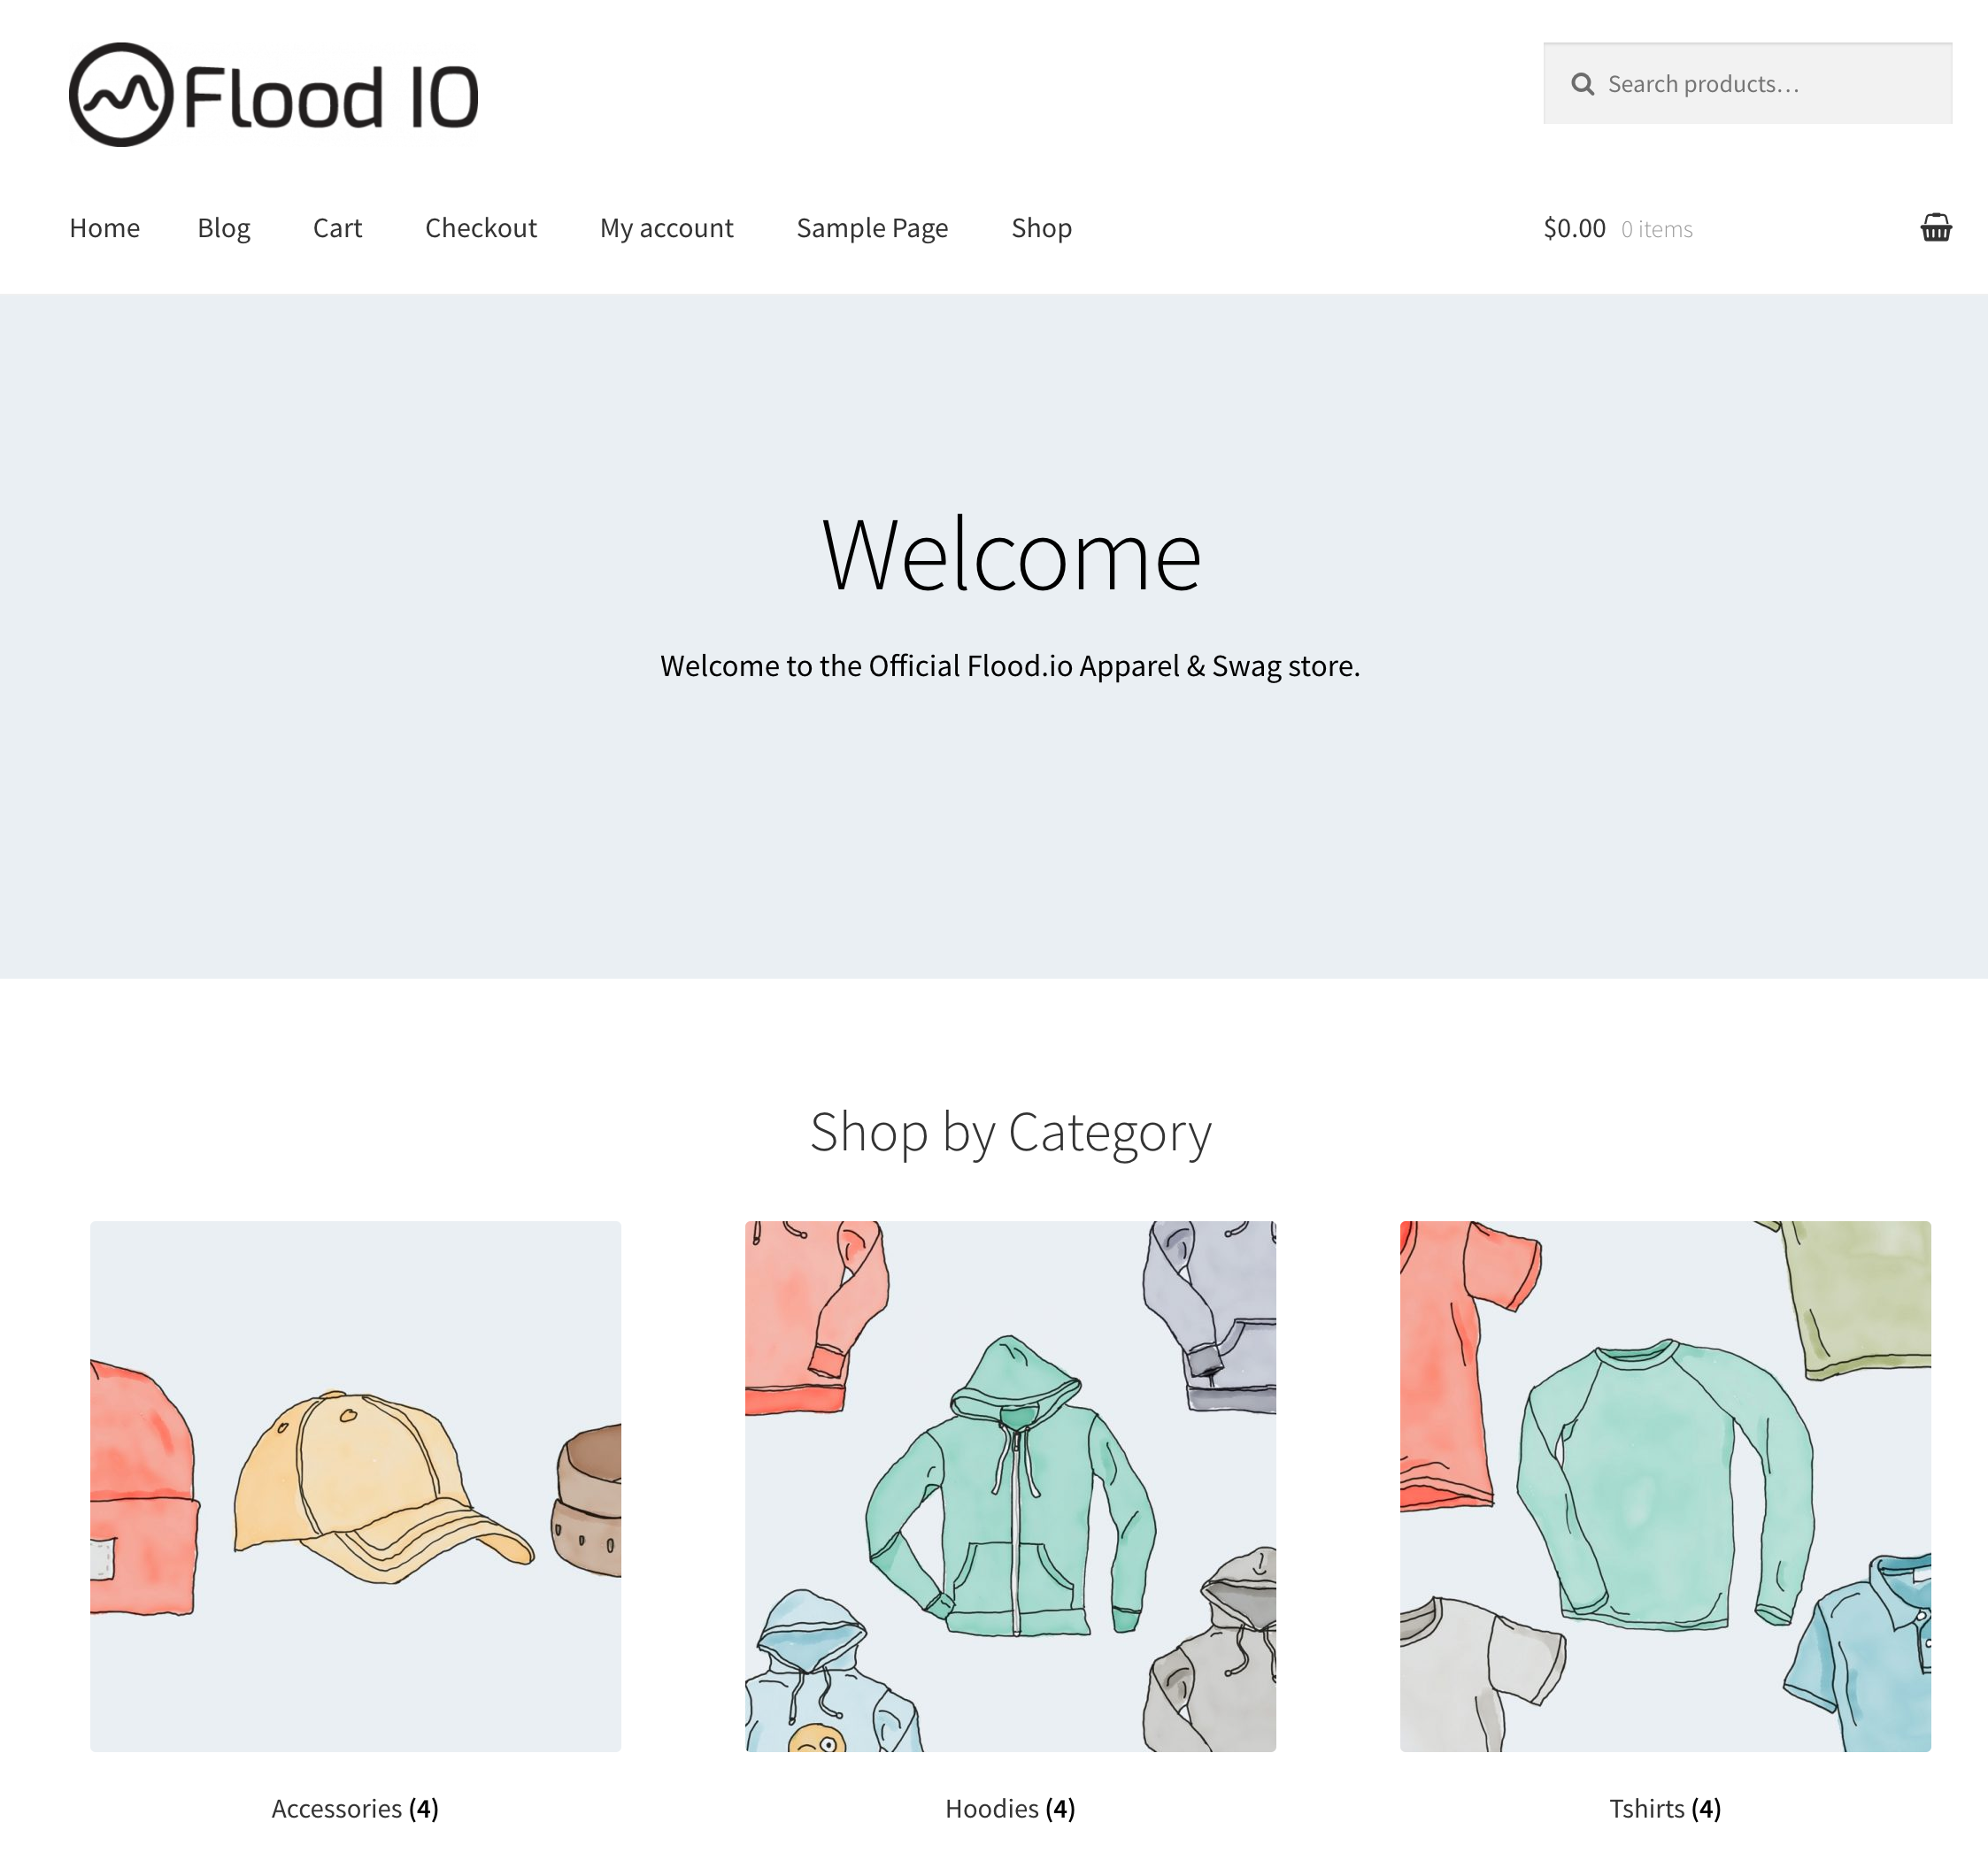
The Flood Store#
The example uses a site called "The Flood Store", a fictional online shopping store that sells Tricentis Flood branded apparel and other clothing items. It is fairly representative of a typical online store that customers may require to be load tested but is complex enough that using a traditional load test tool such as Jmeter or Gatling requires a lot of work in scripting against.
It is built using Wordpress and the WooCommerce plug-in.
We'll show you how you can achieve creating a full user item purchase scenario quickly and easily using Flood Element.
Download the entire script
You can find the complete script used in this scenario, as well as other useful examples, in our load-testing-playground repository.
Step 1 - Navigation and page verification#
The first step we will use contains the step to tell Flood Element to visit the initial target URL and to do some page verification to ensure we have successfully landed on the correct page and the page contents is returned as expected.
Every step should be named appropriately to tell us what functionality is taking place (and how long it takes) within the step contents. So for this step we are timing how long the target URL takes to load from a user's perspective and also the verification that we are on the correct page.
The page text verification is purely just telling Flood Element to wait for a specific visible text element to appear before the step completes.
It serves two important purposes for load testing:
a. If the verification passes - we were able to load the page and verify it was the correct page with the correct time.
b. If the verification fails - the page may be showing an error to the user in circumstances where the server may be overloaded with too much traffic - a common occurrence when executing load tests.
Step 2 - Navigation using HTML Text Links#
The second step enables us to interact with a page object on the front page navigated to in Step 1. That will lead us to the next step in the business process.
For this step we want to navigate to a particular clothing type - called a 'Hoodie'. To get to this clothing section we need to click on a text based link as shown below:
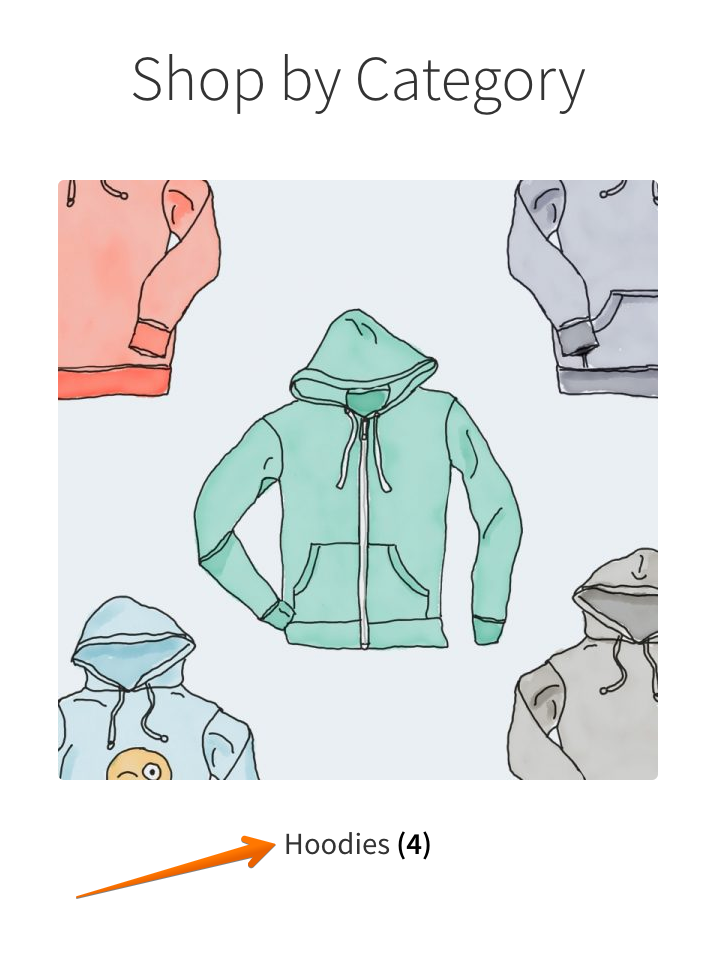
This type of page interaction is very simple and powerful for normal text based links - we use the following step to achieve this as well as another page text verification to ensure we are on the expected page.
This step represents the actual click and subsequent page load of the user interaction of your end user clicking on the 'Hoodies' link and waiting for the next page to load.
Here we have the unique step name (aka. the Transaction name) - but also a new findElement function which is used by Flood Element to identify the object we need to interact with. Inside this function we can use a number of By.xxx sub functions that will allow us to be more specific in identifying the particular object we want.
For text links, we can use partialLinkText and also linkText. linkText needs to be the exact link string specified within the A HREF link tags. partialLinkText only needs a partial match of the link text to be able to identify the object.
Using the Developer Tools feature in Google Element, we are able to view the exact text of a hyperlink. Simply right-click or hold down the CTRL button while clicking on the link and then select Inspect. The Developer Tools sidebar will appear which will automatically highlight the link code for you, as follows:
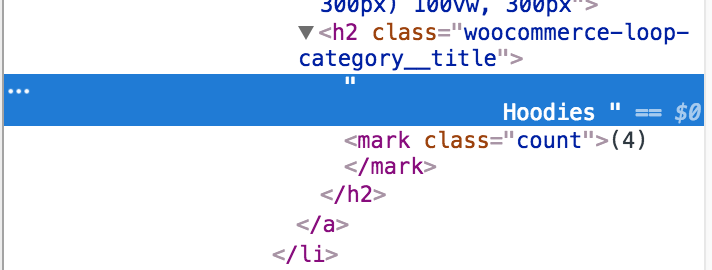
As you can see the link is fairly ugly as it contains a carriage return and a number of spaces on either side of the 'Hoodies' text so definitely a good example of the need to use the partialLinkText function!
Step 3 - Using XPath#
XPath notation is a popular way of identifying objects that you would like to interact with. Flood Element fully supports XPath definitions which can be very helpful and an alternate way of object interaction.
Once we have clicked on the 'Hoodies' link, we are taken to the Hoodies sub-page, which shows the user every single 'Hoodie' clothing type available to be purchased. Each product on a shopping site usually has a uniquely identifying code tied to it that we can use to select that item for completing our business process.
For the sake of this simple script, we know the hoodie we want to add to the cart has a product ID of 39. We can see this again using the Developer Tools and highlighting the Add to Cart button of the item we'd like to add to our cart:

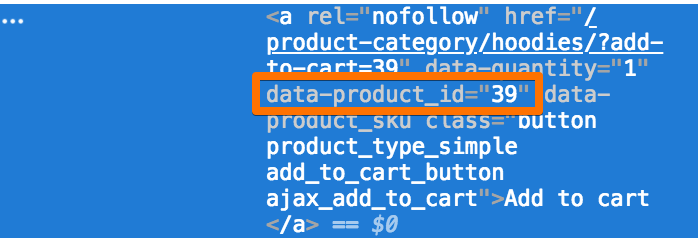
So using the above step XPath example we can use the following XPath expression:
So we are able to narrow down from the entire page what exact object we wish to interact with. We start by looking at the entire document object model (denoted by the //), all links on the page (denoted by the 'a' html tag), any links that have the data-product_id parameter, and lastly only the link that has the data-product_id parameter equal to the value 39.
Flood Element now knows exactly what object it needs to select.
After Flood Element adds this item to the cart, we can navigate to the Cart page where we should see the item we just added.
So we just use another 'browser.visit' step to go to the actual Cart page and verify firstly that the page is present and secondly that the item 'Hoodie with Logo' is listed as an item.
We also have the ability to take a screenshot of this page so we can verify later that we successfully went to the correct page and that the correct item was placed in the cart - exactly how the user will see it.
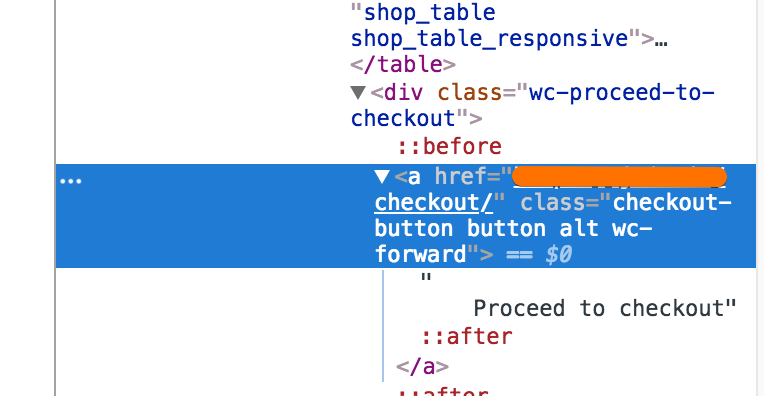
Step 4 - Using CSS Selectors#
Using CSS selectors is another way of identifying objects that we would like to interact with. In this step we would like to proceed to the checkout page with the item we selected in Step 3 in our shopping cart.
Again, we need to have a look at the properties of this button and we do this with the Developer Tools feature as well. The properties can be selected using the following steps:
a. Right click on the Proceed to Checkout button and click Inspect. This will bring up the actual line of code of the button object:
b. Click on the ellipsis link (...) and click Copy > Copy selector.
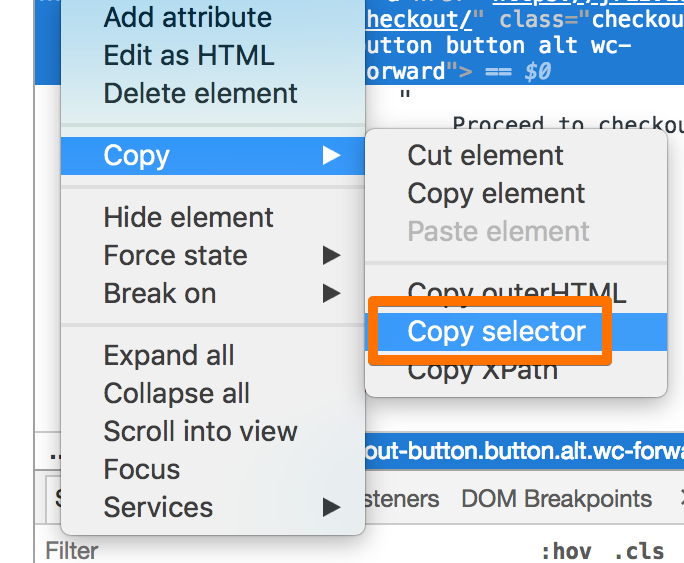
This will copy the exact CSS selector path that can be used in your step as follows:
In this case our Selector produced: '#post-14 > div > div > div > div > div > a' which is what can be used in the By.css step above.
Step 5 - Text entry & form field input#
Filling out a form with a number of text entry fields can be very easily achieved with Flood Element. All we need to do is to find out the CSS or unique input ID of the field we would like to enter text into and include it in a step as follows:
As you can see, a simple line of code per field containing the text string needing to be entered is all that is required to fill out a form.
Step 6 - Placing the order#
We have now almost completed the full item purchase business process. All that is left is to click the place order button using the following step:
When an object has a unique id, it makes our scripting very easy to describe the object. Here the button has an id called 'place_order' which is all we need to use in order to interact with the object successfully.
This step is almost identicial to the one in Step 4 except the usage of the id in this case. We are still clicking on the button and then verifying the order has gone through by verifying the expected text 'Thank you. Your order has been received'.
Conclusion#
So we have completed scripting a full end-to-end purchase of an item in a typical online store using a number of different methods with Flood Element. This is quite a comprehensive and complex task using a protocol level user that is more common in popular load test tools such as Jmeter and Gatling.
Usage of a Browser Level User such as Flood Element takes a lot of the complexity out of scripting these types of dynamic sites.