Video Streaming
Testing Video with Flood Element#
If you’re a video creator, the ultimate goal is often a simple goal: creating a viral video. Unfortunately, preparing for and simulating this all-important use case is typically impossible with protocol based tools. The same feature that makes them so efficient — not using a browser to send the requests — is the same thing that prevents them from being used to simulate the needed browser level events. You see, things like view counts on a video are normally tracked by scripts running on the page. Traditional tools download these scripts along with other page resources, but the scripts themselves are not executed. Enter Flood Element. In this example, we’re going to be using a YouTube video of the opening credits the classical cartoon Top Cat (the indisputable leader of the gang) from Warner Bros.
Step 1. Navigate to the video page#
Let’s start with a basic script:
This is the bones of a basic script in Flood Element. It consists of a single step that involves doing two things: visiting the starting URL, which in this case is the direct link to the YouTube video, and then taking a screenshot once loading the page. Taking screenshots is particularly useful when testing video because screenshots give you a way to check that your script is doing what you want it to do. It’s good to take periodic screenshots as well, to measure progress.
To help you validate that the script runs well locally before scaling to hundreds or thousands of users, you can use our Element CLI. If you save the above code as youtube.ts, open up your terminal in that directory and then type element run youtube.ts. Assuming you’ve got Element set up correctly, you should see something like this:
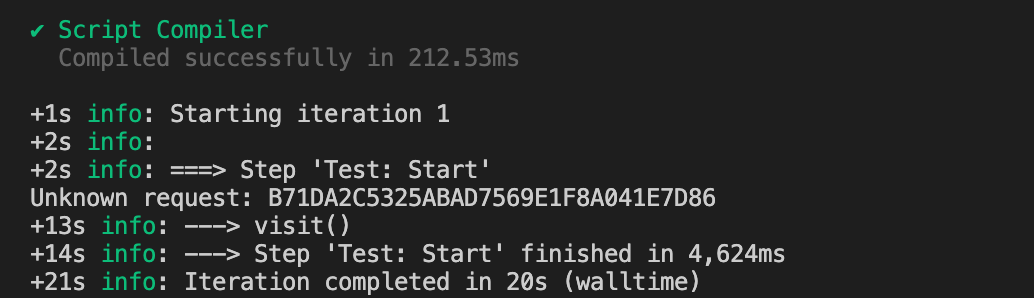
(Note that screenshots are only available when using iTerm2 on MacOS as your shell. They are also saved as files under …/tmp/element-results/youtube .)
Oops! It looks like our script does navigate to the page, but it doesn’t play the video. We’ll need to click on that play button. Let’s add that to our script.
Step 2. Click the Play button#
We’ll need to add some lines to click the play button after visiting the page but before we take the screenshot, so that we can verify later whether or not the play button was clicked.
In this example I used Xpath, but you do have the option to select based on partial text, CSS selector, etc. A tool I like to use to get these is Chrome Developer Tools’ Elements tab, which allows you to get the selectors for a particular element.
Step 3. Take periodic screenshots#
To make sure that the video is really playing, we’ll need to take a screenshot a few seconds after the initial screenshot in order to visually confirm that the video has progressed. Even better, we can get Element to take screenshots at regular intervals. So let’s modify the structure of the code:
This will make it so that on the first iteration (setUp = 1), Element will execute our code and then toggle our indicator to setUp = 0. It will then iterate and because setUp = 0 and the video page has already been opened, it will skip to the code in the else block, which will take a screenshot.
Over several iterations, we’ll be able to see screenshots of the video progressing.
Step 4. Replay if done#
The video we’ve selected has a duration of 41 seconds. What happens if you want to run your test for longer than that? We’ll have to add some code to replay the video when done. Let’s change the content within the else { } block to this:
Now the script will wait for the Replay button that appears after a video finishes playing, and then it will toggle our setUp variable to 1 and then take a screenshot. At the beginning of the next iteration, we’ll reload the page and start from scratch.
Note that I’ve put this code within a try catch because otherwise, waiting for the Replay button when the video has not yet finished playing may cause a timeout due to the button not being visible. Since we expect that to be the case while the video is still playing, we’re catching the error neatly and taking a screenshot.
I’ve also added console.log statements, which can be useful while debugging.
Download the script#
Download the script before moving on to the next step, unless you’ve been following along at home.
Step 5. Run it on Flood!#
The final step is to upload it to Flood and run the test. Click here to see a step-by-step guide for how to do just that. You can choose how many users you’d like to run on Flood and across how many nodes. New users will be given 5 node hours which will allow them to run a test with up to 250 users for 1 hour. Each node will have a different IP address, so plan for that accordingly if your application takes that into account.
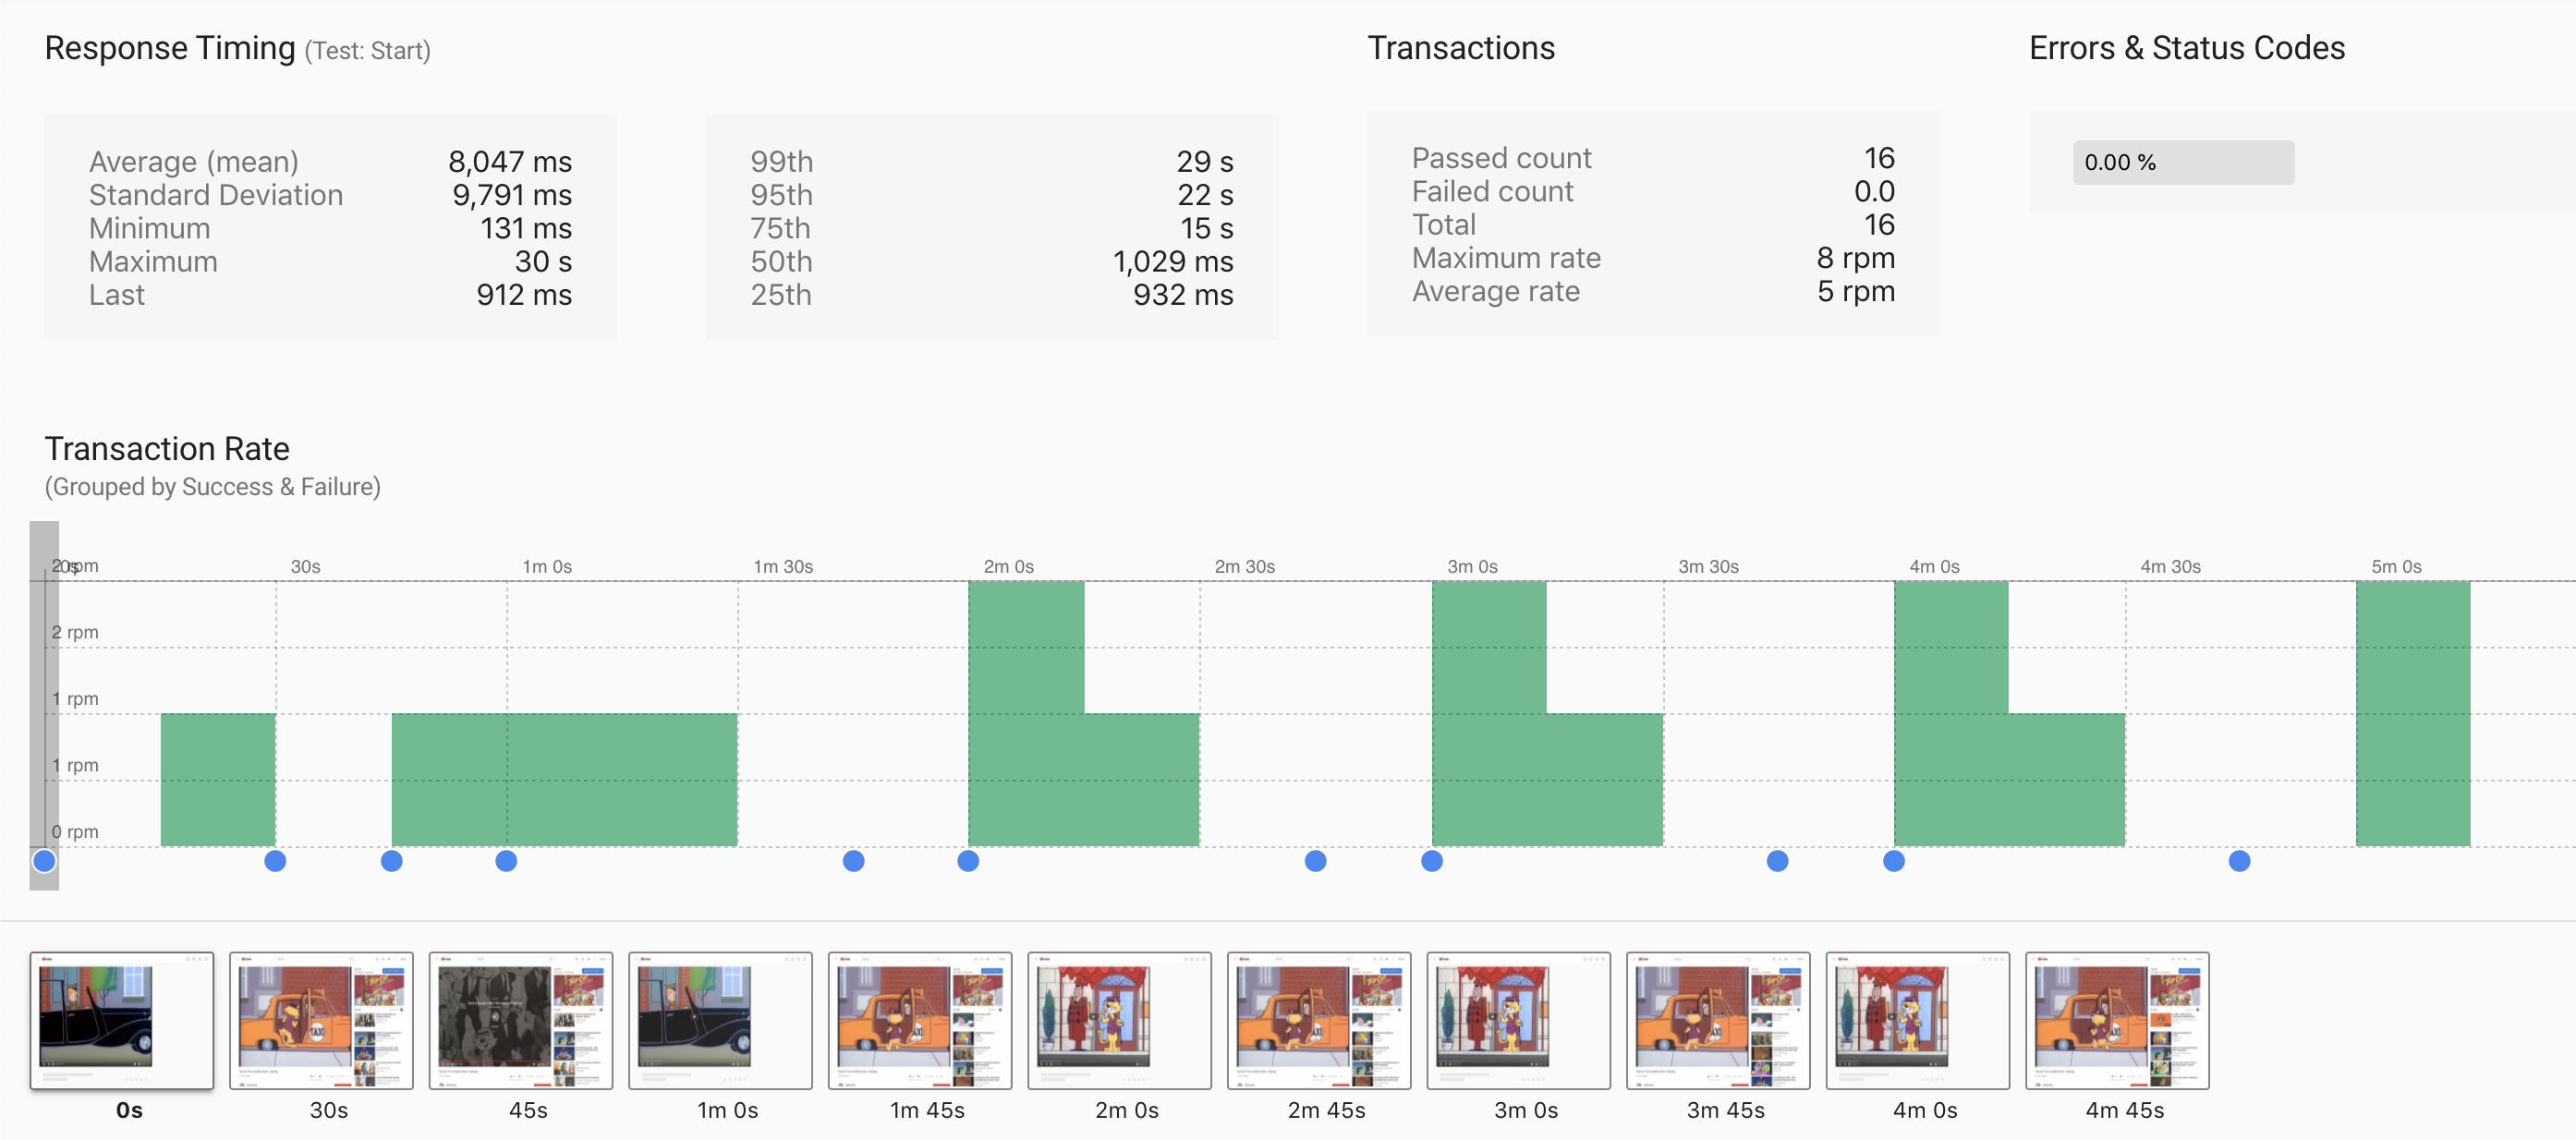
Here’s a shareable link to a test I ran on Flood with this very script. One of the things I love about running it this way is that if you click on the arrow to the right of the sole transaction, you can see screenshots taken along the way to prove that the video is being played:
Some Considerations for Load Testing Video with Flood Element#
Flood requires at least one result every 15 second for 60 seconds in order to graph meaningful results. This is especially important for video because of the potentially longer durations involved for each step of the script, compared to page-based browsing scenarios. The script we’ve created here will work within that constraint.
Taking screenshots and using logs are necessary for debugging. Because the page elements while a video is streaming are static, we’re not going to be able to use those as clues as to where we are in our scenario. To compensate, it’s a good idea to take screenshots and use console.log() to determine progress, especially while debugging. Be careful not to go overboard on these when actually running the load test though, as they will consume system resources.
Videos may behave differently in headless mode. While writing this tutorial, I realised that YouTube auto-plays videos when on non-headless mode (aka, when opening a video link manually on a browser or with the –no-headless flag in Element). When it’s executed in headless mode via Flood Element, it requires a click on the play button to begin. Again, use screenshots to aid you in spotting these differences.